igbo
- Afrikaans
- Albanian
- Amharic
- Arabic
- Armenian
- Azerbaijani
- Basque
- Belarusian
- Bengali
- Bosnian
- Bulgarian
- Catalan
- Cebuano
- Corsican
- Croatian
- Czech
- Danish
- Dutch
- English
- Esperanto
- Estonian
- Finnish
- French
- Frisian
- Galician
- Georgian
- German
- Greek
- Gujarati
- Haitian Creole
- hausa
- hawaiian
- Hebrew
- Hindi
- Miao
- Hungarian
- Icelandic
- igbo
- Indonesian
- irish
- Italian
- Japanese
- Javanese
- Kannada
- kazakh
- Khmer
- Rwandese
- Korean
- Kurdish
- Kyrgyz
- Lao
- Latin
- Latvian
- Lithuanian
- Luxembourgish
- Macedonian
- Malgashi
- Malay
- Malayalam
- Maltese
- Maori
- Marathi
- Mongolian
- Myanmar
- Nepali
- Norwegian
- Norwegian
- Occitan
- Pashto
- Persian
- Polish
- Portuguese
- Punjabi
- Romanian
- Russian
- Samoan
- Scottish Gaelic
- Serbian
- Sesotho
- Shona
- Sindhi
- Sinhala
- Slovak
- Slovenian
- Somali
- Spanish
- Sundanese
- Swahili
- Swedish
- Tagalog
- Tajik
- Tamil
- Tatar
- Telugu
- Thai
- Turkish
- Turkmen
- Ukrainian
- Urdu
- Uighur
- Uzbek
- Vietnamese
- Welsh
- Bantu
- Yiddish
- Yoruba
- Zulu
Telephone: +86 13120555503
Email: frank@cypump.com
Nov . 19, 2024 13:36 Back to list
Building a DIY Slurry Pump for Effective Fluid Management in Your Projects
Creating a Homemade Slurry Pump for Efficient Fluid Handling
In various industries, the need for efficient fluid handling is paramount. Slurry pumps, which transport a mixture of solids and liquids, are crucial in applications like mining, wastewater treatment, and construction. While commercial slurry pumps can be costly, creating a homemade version can be a practical and economical solution for those engaged in DIY projects or smaller operations. This article explores the essential components and steps needed to fabricate an efficient homemade slurry pump.
Understanding Slurry Pumps
Before diving into the construction process, it's important to understand what a slurry pump does. These pumps are designed to move mixtures that are too thick for standard pumps. This includes a variety of materials, such as sand, clay, and even chemical slurries. The pump must be robust enough to handle the abrasive nature of the solids without suffering significant wear or damage over time.
Materials Required
Creating a homemade slurry pump requires specific materials and tools. Here’s a list to get you started
- Pump Casing Durable materials like PVC or polypropylene are ideal. They resist chemical corrosion and can handle the wear from solids. - Impeller You can use plastic or metal impellers, designed to accommodate the viscosity and density of the slurry. - Motor A submersible or a standard electric motor can be employed depending on your design. The power should be sufficient to handle the maximum expected flow rate. - Seals and Bearings These prevent leakage and reduce friction in the pump, extending its lifespan. - Hoses/Piping These will transport the slurry to and from the pump. - Hardware Bolts, screws, and possibly brackets for assembly.
Step-by-Step Construction
1. Design the Pump Start with a basic design of your slurry pump. It should include a motor mount, impeller placement, and inlet/outlet ports for the slurry. You can sketch out the design to visualize the final product.
2. Build the Pump Casing Cut the casing materials to the desired dimensions. Ensure all joints are tightly sealed to prevent leaks. You can use adhesive or solvent welding for plastic materials.
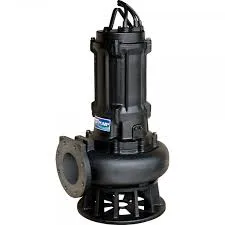
'creating a homemade slurry pump for efficient fluid handling ...'

3. Create the Impeller The impeller is the heart of your pump. It should be shaped properly to create enough pressure to lift the slurry. This component can be crafted using a local machine shop if you lack machining skills.
4. Install the Motor Secure the motor to the pump casing. Make sure it aligns with the impeller for optimal performance. Use vibration-dampening mounts to reduce noise and extend motor life.
5. Assemble All Components Once the casing, impeller, and motor are ready, assemble them. Make sure to use appropriate seals and bearings to prevent slurry from escaping and to minimize friction where moving parts meet.
6. Connect Hoses/Piping Attach the inlet and outlet hoses to the pump, ensuring they are clamped tightly to avoid any blow-offs during operation.
7. Test the Pump Before using the pump for its intended purpose, conduct a trial run. Fill the pump with water mixed with sand (or the intended slurry) to check for leaks and ensure it operates smoothly.
Maintenance Tips
Once your homemade slurry pump is operational, regular maintenance is crucial. Inspect the seals, bearings, and impeller for wear and replace them as necessary. Keep the pump clean to prevent clogs, and ensure that all connections remain secure to avoid leaks.
Conclusion
Building a homemade slurry pump can serve as both an educational project and a practical addition to your equipment. It allows for customization tailored to specific needs and can save money compared to purchasing commercial options. Whether you're managing a small farm, working on home landscaping, or engaging in DIY industrial projects, an efficient slurry pump can facilitate the handling of fluids and solids alike. With the right materials, a bit of ingenuity, and regular maintenance, your homemade pump can deliver robust performance for years to come.
-
Custom Drilling Mud and Slurry Pump Supplier - High Efficiency, Tailored Solutions
NewsJun.10,2025
-
Supply Vertical Submersible Sewage Pump High-Efficiency WQ/QW Pumps Supplier
NewsJun.10,2025
-
Premium Sewage Ejection System & Pumps Efficient Waste Removal
NewsJun.09,2025
-
Premium Wholesale Slurry Pump Impellers Durable & Efficient Slurry Handling
NewsJun.09,2025
-
Top Sewage Pump Companies Durable Industrial Solutions for Efficiency
NewsJun.09,2025
-
Heavy Duty Slurry Pumps - OEM High Performance & Bulk Wholesale
NewsJun.09,2025


